Table of Contents
Protecting challenge posts with password
Posted on
Problem
I want to publish my challenge writeups but at the same time I do not want to spoil anyone by making the writeup publicly available. I saw that some people on the internet require a visitor to provide the challenge flag as password before access to the writeup is granted. I like the idea and it is also a good chance for me to improve my AWS skills.
Since this blog is hosted on s3 and distributed via CloudFront, I need a solution that integrates well with both.
If you came here because you have a similar problem and are looking for a solution read the whole post first.
Idea
Solution
A basic Lambda function
lambda@edge functions can be invoked by a total of four events that occur
when a user (AWS calls them viewers) talks to CloudFront. These events
are3
- When CloudFront receives a request from a viewer (viewer request)
- Before CloudFront forwards the request to the origin (origin request)
- When CloudFront receives a response from the origin (origin response)
- Before CloudFront returns the response to the viewer (viewer response)
For checking if a viewer has already provided the flag and therefore is authenticated, I chose the viewer request as trigger event for my Lambda function.
The Lambda function will receive a event when triggered. In my case this will be a request event4. This event contains different information. For example, it contains the request object and information about the CloudFront distribution. Following a sample viewer request event taken from AWS’s developer guide4.
"Records": [
    {
        "cf": {
            "config": {
                "distributionDomainName": "d111111abcdef8.cloudfront.net",
                "distributionId": "EDFDVBD6EXAMPLE",
                "eventType": "viewer-request",
                "requestId": "4TyzHTaYWb1GX1qTfsHhEqV6HUDd_BzoBZnwfnvQc_1oF26ClkoUSEQ=="
            },
            "request": {
                "clientIp": "203.0.113.178",
                "headers": {
                    "host": [
                        {
                            "key": "Host",
                            "value": "d111111abcdef8.cloudfront.net"
                        }
                    ],
                    "user-agent": [
                        {
                            "key": "User-Agent",
                            "value": "curl/7.66.0"
                        }
                    ],
                    "accept": [
                        {
                            "key": "accept",
                            "value": "*/*"
                        }
                    ]
                },
                "method": "GET",
                "querystring": "",
                "uri": "/"
            }
        }
    }
]
Since the request object in the event contains a header object, it is
possible for the Lambda function to check if a valid Authorization header is
set.
If a valid Authorization header is set, the Lambda function must return the
request object. If no valid Authorization header is set, the Lambda
function should create a response object that tells the viewer to
authenticate and return it to the viewer. In this case, the viewer request
does not reach the s3 origin.
The below python listing contains an initial authentication logic that uses basic authentication. However, this comes with two limitations.
- It is not possible to only ask for a password. The user will always be prompted for username and password.
- It is not possible to provide a custom message to the viewer to tell him what is expected.
import base64


def lambda_handler(event, context):
    request = event['Records'][0]['cf']['request']
    headers = request['headers']

    request_uri = request['uri']
    passwords = {'/writeups/htb/challenges/web/jscalc.html': 'asdfgh'}

    if not request_uri in passwords.keys():
        """
        If no password is associated with the requested
        URI, simply return the request so that CloudFront
        can pass it to the origin
        """
        return request

    """
    build our version of the authorization header
    for later comparison
    """
    auth_string = 'Basic ' + base64.b64encode(bytes(':'+ passwords[request_uri], 'utf-8')).decode('utf-8')


    if 'authorization' in headers.keys():
        auth_headers = headers['authorization']
    else:
        auth_headers = []

    authenticated = False

    if len(auth_headers) == 0:
        """
        if no authorization header is present, we
        do not modify the value of the variable `authenticated`
        """
        pass
    else:
        for auth_header in auth_headers:
            """
            check all authorization headers until
            a valid authorization header is found or
            no authorization headers are left.
            """
            if auth_header['value'] == auth_string:
                authenticated = True
                break

    if authenticated == False:
        body = 'Unauthorized'
        response = {
            'status': '401',
            'statusDescription': 'Unauthorized',
            'body': body,
            'headers': {
                'www-authenticate': [{'key': 'WWW-Authenticate',
                                      'value': 'Basic'}]
            }
        }
        return response
    else:
        return request
Now that the authentication logic is coded, it is time to create the Lambda function. The AWS developer guide provides the step that are required when creating and configuring the Lambda function via the AWS web console5.
However, I want to also improve my AWS CLI skills and therefore, I try to configure the Lambda function via the CLI. AWS also provides instructions on how to do this in their developer guide6.
The creation of the Lambda function via the CLI consists of the following high-level steps.
- Create a role, if not exists, that allows Lambda and lambda@edge to assume a role.
- Create a role policy, if not exists, that allows Lambda write logs to CloudWatch logs.
- Attach role policy to the role.
- Create the Lambda function in the
us-east-1region. - Test the Lambda function.
1. Create a role if it does not exists yet
The first step is to create a trust policy. This trust policy defines that
the services lambda.amazonaws.com and edgelambda.amazonaws.com are
allowed to call the AssumeRole action of AWS Security Token Service (STS).
{
    "Version": "2012-10-17",
    "Statement": [
        {
            "Effect": "Allow",
            "Principal": {
                "Service": [
                    "lambda.amazonaws.com",
                    "edgelambda.amazonaws.com"
                ]
            },
            "Action": "sts:AssumeRole"
        }
    ]
}
This trust policy will be configured as --assume-role-policy-document for
the execution role that will be created for the Lambda function. For easier
reference, I saved the policy in a file named trust-policy.json
Now that the trust policy is saved to a file, I can create the execution
role via the command below in listing 4. This command specifies the name of
the role via the --role-name parameter, the path where the role can be
referenced via the --path parameter, the tags that should be set via the
--tags parameter, and the trust policy via the
--assume-role-policy-document parameter.
$ aws iam create-role \
    --role-name lambda_at_edge \
    --path '/service-role/' \
    --assume-role-policy-document file://trust-policy.json \
    --tags 'Key=application,Value=blog'
After executing the above command, the AWS CLI returns a json object that describes the created role.
{
    "Role": {
        "Path": "/service-role/",
        "RoleName": "lambda_at_edge",
        "RoleId": "AROA6BCKUOKMYISPGJ2TM",
        "Arn": "arn:aws:iam::<ACCOUNT_ID>:role/service-role/lambda_at_edge",
        "CreateDate": "2023-12-27T11:56:28+00:00",
        "AssumeRolePolicyDocument": {
            "Version": "2012-10-17",
            "Statement": [
                {
                    "Effect": "Allow",
                    "Principal": {
                        "Service": [
                            "lambda.amazonaws.com",
                            "edgelambda.amazonaws.com"
                        ]
                    },
                    "Action": "sts:AssumeRole"
                }
            ]
        },
        "Tags": [
            {
                "Key": "application",
                "Value": "blog"
            }
        ]
    }
}
2. Create a policy if it does not exists yet
Now that the role is created, I have to create a permissions policy to
grant Lambda at least write access to CloudWatch logs. I save the policy in
a file called permissions-policy.json.
{
    "Version": "2012-10-17",
    "Statement": [
        {
            "Effect": "Allow",
            "Action": [
                "logs:CreateLogGroup",
                "logs:CreateLogStream",
                "logs:PutLogEvents"
            ],
            "Resource": [
                "arn:aws:logs:*:*:*"
            ]
        }
    ]
}
This permissions policy can now be created.
$ aws iam create-policy \
  --policy-name "Allow_LambdaEdge_CloudWatchLogs" \
  --tags "Key=application,Value=blog" \
  --policy-document file://iam/permissions-policy.json \
  --path '/service-role/'
Again, AWS provides information about the object that was just created.
{
    "Policy": {
        "PolicyName": "Allow_LambdaEdge_CloudWatchLogs",
        "PolicyId": "ANPA6BCKUOKMTR2TUMQBO",
        "Arn": "arn:aws:iam::<ACCOUNT_ID>:policy/service-role/Allow_LambdaEdge_CloudWatchLogs",
        "Path": "/service-role/",
        "DefaultVersionId": "v1",
        "AttachmentCount": 0,
        "PermissionsBoundaryUsageCount": 0,
        "IsAttachable": true,
        "CreateDate": "2023-12-27T12:24:02+00:00",
        "UpdateDate": "2023-12-27T12:24:02+00:00",
        "Tags": [
            {
                "Key": "application",
                "Value": "blog"
            }
        ]
    }
}
3. Attach permissions policy to role
Now that the permissions policy is created, I can attach it to the previously created execution role. For this, I need the role name as well as the policy ARN.
$ aws iam attach-role-policy \
  --role-name lambda_at_edge \
  --policy-arn arn:aws:iam::<ACCOUNT_ID>:policy/service-role/Allow_LambdaEdge_CloudWatchLogs
This time, AWS does not provide any feedback about the result of the executed command. To check if the command completed successfully and if the permissions policy is attached to the role, the command in listing 10 can be used.
$ aws iam list-attached-role-policies --role-name lambda_at_edge
{
    "AttachedPolicies": [
        {
            "PolicyName": "Allow_LambdaEdge_CloudWatchLogs",
            "PolicyArn": "arn:aws:iam::<ACCOUNT_ID>:policy/service-role/Allow_LambdaEdge_CloudWatchLogs"
        }
    ]
}
The output shows that the policy is attached to the role.
4. Create the Lambda function
To create the lambda@edge function, I need to have a few things ready.
- Zip archived version of the Python code. This will be uploaded via the CLI command to Lambda upon function creation.
- The filename of the Python code and the name of the function that Lambda should execute. The combination of both will be used by Lambda to identify the entry point i.e., the Python function that should be executed..
- The name of the Lambda function. This is the name that allows for the identification of the function.
- The ARN of the execution role. This is required for equipping the Lambda function with appropriate permissions.
- The runtime which should be used to execute the function.
- The region. This must be
us-east-1forlambda@edgeto work.
Once everything is at hand, the function can be created.
$ aws lambda create-function \
  --function-name blog-challenge-auth \
  --zip-file fileb://handler.zip \
  --handler handler.lambda_handler \
  --runtime python3.11 \
  --role arn:aws:iam::<ACCOUNT_ID>:role/service-role/lambda_at_edge \
  --region us-east-1
The --handler parameter expects a value in the following pattern
<FILENAME_WITHOUT_EXTENSION>.<FUNCTION_TO_CALL_BY_LAMBDA>.
The command prints information about the freshly created Lambda function and confirms that it was created successfully. The next step is to test the function.
5. Testing the function
I found no way to test the function via the regular AWS CLI. Since October 2023, it seems to be possible to use Lambda test events from the SAM CLI7. I do not want to install the SAM CLI for the moment and therefore test the Lambda function via the web console.
To test the function, I have to open the Lambda Service in the AWS web
console. Since the function runs in the region us-east-1, this region has
to be selected. Once the function is selected, the tab Test must be
selected.
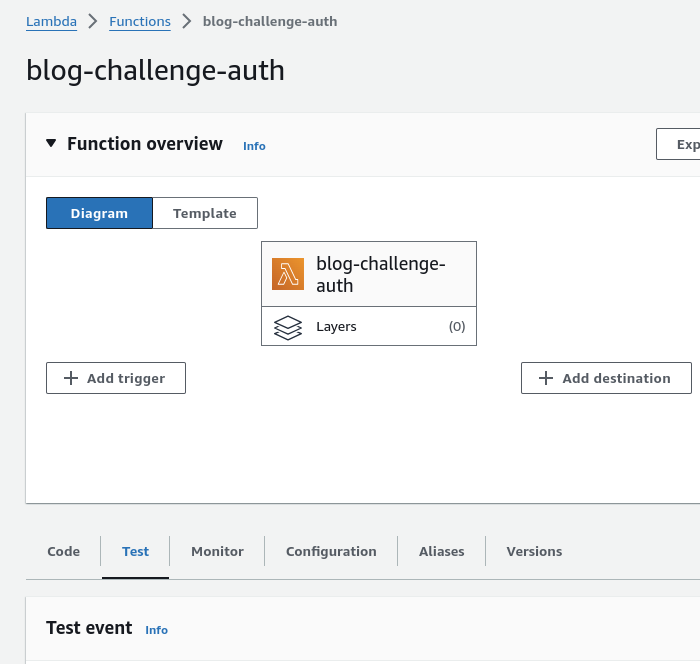
Figure 1: AWS Lambda web UI
This opens the Test event section below. The Test event section
contains a text area called Event JSON where I paste my test event.
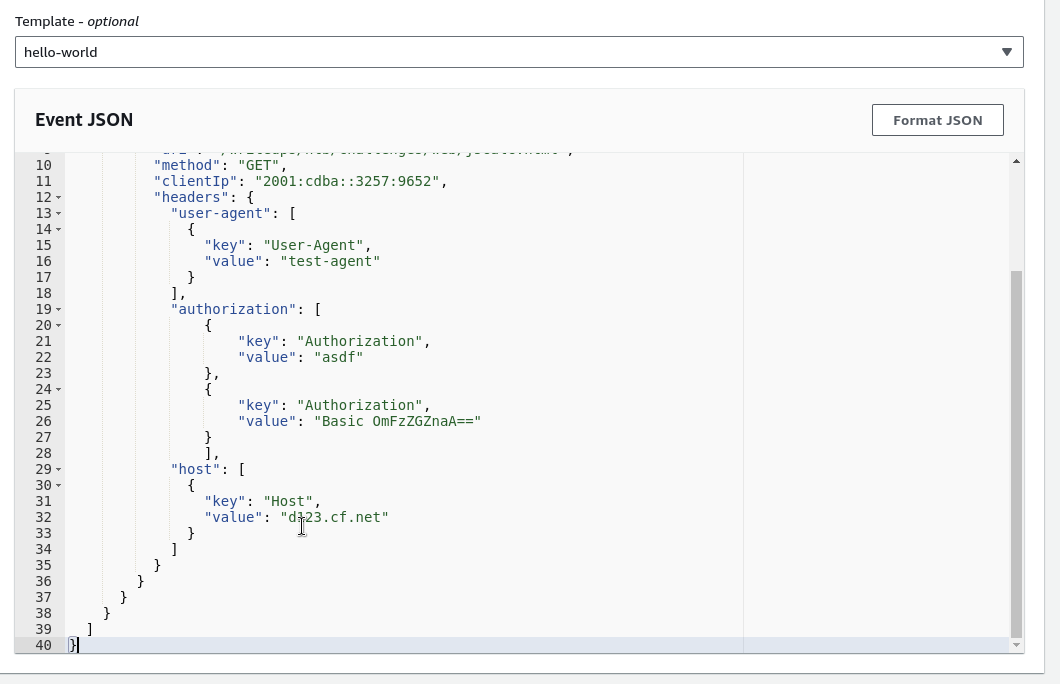
Figure 2: Test event
To start the test, the Test button must be clicked. Once the test is
executed, the results will be shown in the web console.
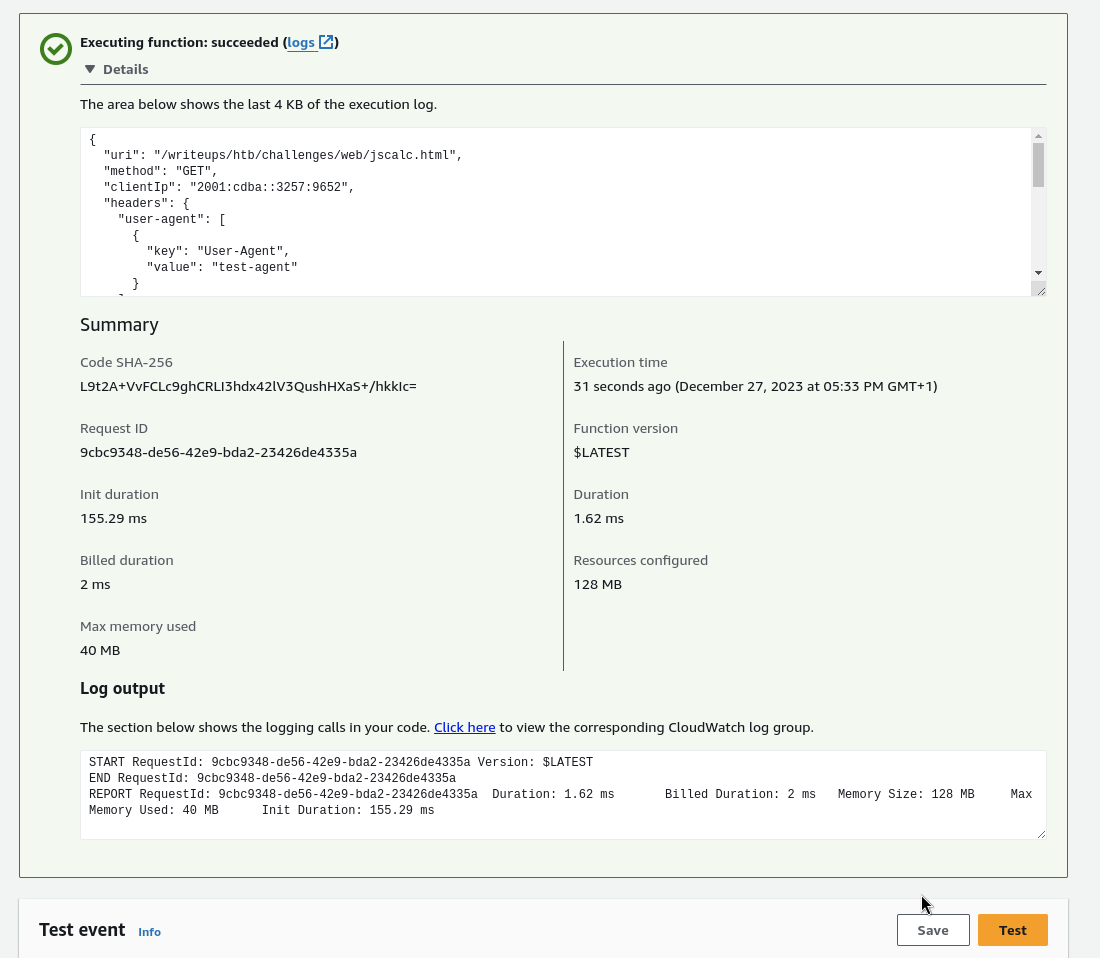
Figure 3: Test results
Now it is easy to test the behavior of the function by modifying the test event and re-executing the function.
I test the function with the following test cases
- No authorization header is present.
- Single invalid authorization header.
- Two invalid authorization header.
- A valid and an invalid authorization header.
- An invalid and a valid authorization header.
The function works as expected and therefore I move on deploying it to
lambda@edge. Before proceeding, I create a version8 (think of
snapshot) of the function with the command of listing 12. This is required
since AWS only allows versions of functions to have triggers assigned.
$ aws lambda publish-version \
  --region us-east-1 \
  --function-name blog-challenge-auth
Adding triggers to the function
The AWS developer guide describes a Lambda@Edge trigger as:
[…] one combination of a CloudFront distribution, cache behavior, and event that causes a function to execute.9
To add a trigger to the function, I use the AWS web console for Lambda. I select the function for which the trigger should be configured. Since a trigger can only attached to a version of a function, I have to select the version of the function that I want to use.

Figure 4: Selecting the version
The selected version is indicated above the Function overview box. Once
the version is selected, I select the Configuration tab and then
Triggers.
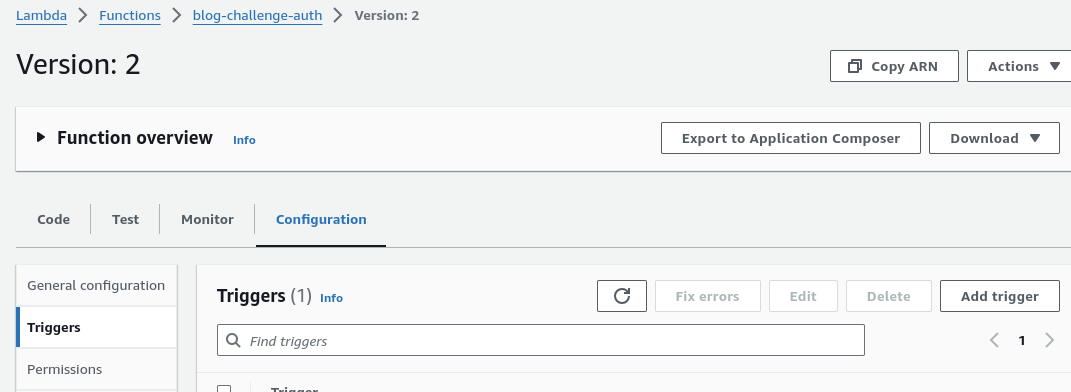
Figure 5: Navigating to the triggers sub menu
Via the Add triggers button, I can add a trigger to the function.
In the appearing Trigger configuration, I select CloudFront as trigger,
select the distribution to which the function should be associated, the
trigger event, and lastly tick the box Confirm deploy to Lambda@Edge.

Figure 6: Adding the trigger
Once the trigger is added, it takes a while for the CloudFront distribution to be deployed.
After uploading a sample challenge writeup to s3 and trying to access it, I verified that the deployment works.
Refactoring the function code to use a dedicated login page
As already mentioned, relying on HTTP basic authentication comes with some restrictions. Therefore, I decided to refactor the Python code to no longer require basic authentication and instead use a dedicated authentication page in combination with a cookie to check if the correct flag for the page to be visited was provided. The new application logic is as follows.
If a viewer wants to access any page of the blog, the Lambda checks if access to the requested page is restricted or not. If access should not be restricted, Lambda returns the request the CloudFront which passes it to the origin.
If access to the page should be restricted, Lambda checks if the user already has the correct cookie set. If so, the request will be returned to CloudFront which passes it to the origin. If no cookie is set, the viewer will be redirected to the authentication page and asked for the flag. The original URL will be passed as a GET parameter so that the viewer can be redirected in the case of a successful authentication.
If the flag was not correct, the page will be reloaded and the authentication process starts over. The code now looks as follows.
import base64
from urllib.parse import parse_qs
import re
import json

auth_page = f"""
<!DOCTYPE html>
<html lang="en">
    <head>
        <meta charset="UTF-8">
        <title>Authentication required</title>
        <link rel="stylesheet" type="text/css" href="/css/simple.css"/>
        <link rel="stylesheet" type="text/css" href="/css/custom.css"/>
    </head>
    <body>
        <h2>Login required</h2>
    <p>Provide the content of the flag i.e. HTB{ONLY_THIS} to read the post.</p>
        <form action="" method="post">
            <input type="text" placeholder="The flag goes here..." name="flag">
            <button type="submit">Go</button>
        </form>
    </body>
</html>
"""


"""
Cookie: flag=HTB{...}
"""
def get_passwords() -> dict:
    with open('./challenges.json', 'r') as f:
        return json.loads(f.read())

passwords = get_passwords()

def parseCookies(headers) -> dict:
    """
    Taken from AWS CloudFront developer guide at
    https://docs.aws.amazon.com/AmazonCloudFront/latest/DeveloperGuide/lambda-examples.html
    and modified to honor multiple instances of the header "Cookie:"
    """
    parsedCookie = {}
    cookie_headers = headers.get('cookie')
    if cookie_headers:
        for cookie_header in cookie_headers:
            for cookie in cookie_header['value'].split(';'):
                if cookie:
                    parts = cookie.split('=')
                    parsedCookie[parts[0].strip()] = parts[1].strip()
    return parsedCookie


def lambda_handler(event, context):
    request = event['Records'][0]['cf']['request']
    headers = request['headers']

    request_uri = request['uri']
    #passwords = {'/writeups/htb/challenges/web/jscalc.html': 'asdfgh'}
    auth_uri = '/auth'
    protected_uris = passwords.keys()
    cookies = parseCookies(headers)
    forbidden_methods = ['OPTIONS', 'PUT', 'PATCH', 'DELETE']
    forbidden_chars = [ '"', "'", '\\', '|', '+', '-',
                       '[', ']', '$', '!', '@', '#', '%', '^',
                         '&', '*', '(', ')', ';', ',',
                         '?', ':', ' ']
    error_response = {
        'status': '500',
        'statusDescription': 'InternalServerError',
        'body': 'An error occurred'
    }


    if request['method'] in forbidden_methods:
        return {
            'status': '405',
            'statusDescription': 'MethodNotAllowed',
            'body': 'Method not allowed'
        }

    flag = ''

    if 'flag' in cookies.keys():
        flag = cookies['flag']

    if request_uri != auth_uri and not request_uri in protected_uris:
        """
        If no password is associated with the requested
        URI and if the viewer does not request the authentication page,
        simply return the request so that CloudFront can pass it to the origin
        """
        return request

    if request_uri != auth_uri and request_uri in protected_uris:
        password = passwords[request_uri]
        if flag == password:
            """
            If a viewer tries to access the protected page and has the flag cookie set
            to the challenge flag (i.e., viewer has authenticated) return the request
            so that CloudFront can pass it
            to the origin
            """
            return request

    if request_uri != auth_uri and request_uri in protected_uris:
        password = passwords[request_uri]
        if flag != password:
            """
            If a viewer does not have the flag cookie set to the correct value
            (i.e., viewer is unauthenticated) redirect him to the login page
            for authentication.
            """
            return {
                'status': '302',
                'statusDescription': 'Found',
                'headers': {
                    'location': [{
                        'key': 'Location',
                        'value': f'/auth?redirect_url={request_uri}'
                    }]
                }
            }

    if request_uri == auth_uri and request['method'] == 'GET':
        """
        if a viewer requests the auth page, return the auth page.
        """
        return {
            'status': '200',
            'statusDescription': 'Ok',
            'body': auth_page,
            'headers': {
                "content-type": [
                    {
                        'key': 'Content-Type',
                        'value': 'text/html'
                    }
                ]
            }
        }

    if request_uri == auth_uri and request['method'] == 'POST':
        """
        handle authentication, set the flag cookie, and redirect
        the visitor to the URL specified in the url parameter
        redirect_url (ensure that redirect_url starts with / and
        has no http[s]:// or other protocol handlers in it)
        """
        if not 'querystring' in request.keys():
            return error_response

        querystring = request['querystring']
        if len(querystring) <= 0:
            return error_response

        for char in querystring:
            if char in forbidden_chars:
                return error_response
        # if any(char in querystring for char in forbidden_chars):
        #     return error_response2

        parsed_qs = parse_qs(querystring)
        redirect_url = parsed_qs['redirect_url'][0]
        if not redirect_url in passwords:
            return error_response

        password = passwords[redirect_url]

        if not 'body' in request.keys():
            return error_response

        body_data = request['body']['data']
        if len(body_data) <= 0:
            return error_response

        """
        Lambda@Edge passes the body as bas64 encoded string.
        Decode it to make use of it
        """
        body_bytes = body_data.encode('utf-8')
        body_bytes_decoded = base64.b64decode(body_bytes)
        body_plain = body_bytes_decoded.decode('utf-8')

        for char in body_plain:
            if char in forbidden_chars:
                return error_response
        # if any(char in body_plain for char in forbidden_chars):
        #     return error_response6

        parsed_body_data = parse_qs(body_plain)

        if not 'flag' in parsed_body_data:
            return error_response

        submitted_flag = parsed_body_data['flag'][0]

        if submitted_flag == password:
            return {
                'status': '302',
                'statusDescription': 'Found',
                'headers': {
                    'location': [{
                        'key': 'Location',
                        'value': redirect_url
                    }],
                    'set-cookie': [{
                        'key': 'Set-Cookie',
                        'value': f'flag={submitted_flag}'
                    }]
                }
            }
        else:
            location = '?'.join([request_uri, querystring])
            return {
                'status': '302',
                'statusDescription': 'Found',
                'headers': {
                    'location': [{
                        'key': 'Location',
                        'value': location
                    }]
                }
            }
Keeping challenge flag separated from the function code
To keep the challenge flags separated from the Lambda function code, I use a dedicated JSON file that is placed next to the function code and therefore will be deployed together with it. For the moment, I don’t foresee too many frequent changes to this file that could justify placing the flags somewhere else i.e. in a DynamoDB table or on S3.
The only addition that I had to make for this to work is the following.
def get_passwords() -> dict:
    with open('./challenges.json', 'r') as f:
        return json.loads(f.read())

passwords = get_passwords()
This piece of code is placed outside the handler function. Within the
handler function, I removed the initialization of the passwords variable,
as it is no longer needed.