Table of Contents
- Static Website Hosting on S3 and CloudFront
- Requesting the certificate
- Creating the S3 buckets
- Uploading files to the subdomain S3 bucket
- Configuring the root domain s3 bucket
- Configuring the CloudFront distribution for the subdomain
- Configuring the CloudFront distribution for the root domain
- Configuring Route53 to route traffic to the CloudFront distribution
- Adding a response header policy to a distribution
Static Website Hosting on S3 and CloudFront
Published on:
AWS describes how to host a static website on S3 and CloudFront in one of their developer guides1. The process is fairly straight forward and consists of the following high level steps.
- Register a domain.
- Request a public certificate.
- Create an S3 bucket to host the subdomain.
- Create an S3 bucket, for the root domain (will only be used to redirect traffic to the subdomain).
- Upload website files to subdomain S3 bucket.
- Set up root domain bucket for website redirect.
- Create an Amazon CloudFront distribution for the subdomain.
- Create an Amazon CloudFront distribution for the root domain.
- Route DNS traffic for the (sub)domain to the CloudFront distribution.
- Test the website
As I already have a domain registered, I skip step one and jump directly into requesting a public certificate.
Requesting the certificate
Public certificates requested via ACM are free of charge and AWS will automatically renew the certificate in time if it is associated to at least one AWS resource.
To associate a certificate to CloudFront, it is mandatory for the certificate
to be requested in the region us-east-1.
I use the AWS CLI to request a public certificate from AWS.
$ aws acm request-certificate \
     --domain-name *.allcomputersarebroken.org \
     --validation-method DNS --key-algorithm RSA_2048 \
     --region us-east-1
Note: CloudFront only supports RSA and ECDSA key types. Furthermore, the us-east-1 region only allows to request RSA keys with a key length of 2048 bit.
This command will return the CertificateArn of the freshly created
certificate. This ARN can be used to query additional information of the
certificate.
Before the certificate can be used, it is necessary to validate it with the specified method. In my case, I chose DNS validation.
$ aws acm describe-certificate \
  --certificate-arn arn:aws:acm:us-east-1:[...ARN...] \
  --region us-east-1 | jq .Certificate.DomainValidationOptions[0].ResourceRecord

{
    "Name": "_07e28940a8a5ce5c4477783870182196.allcomputersarebroken.org.",
    "Type": "CNAME",
    "Value": "_a0194ea7afb639e69502ea61f850e1db.mhbtsbpdnt.acm-validations.aws."
}
This is the resource record that must be set in the DNS zone for the given domain. This resource record can be thought of something like a challenge that is placed in the DNS to proof that I have control over the domain for which I request a certificate.
As I currently do not feel confident in configuring Route53 via the AWS CLI, I use the web console to configure the CNAME resource record.
After the record is set, it only takes a few moments for the certificate to be validated and ready for usage.
Now that the certificate can be used, it is time to create the S3 buckets.
Creating the S3 buckets
Again, the AWS CLI can be used to create resources on AWS. When creating the buckets, it is important that the bucket name is unique.
$ aws s3api create-bucket \
    --bucket blog.allcomputersarebroken.org \
    --region eu-central-1 \
    --create-bucket-configuration LocationConstraint=eu-central-1

{
    "Location": "http://blog.allcomputersarebroken.org.s3.amazonaws.com/"
}
$ aws s3api create-bucket \
    --bucket allcomputersarebroken.org \
    --region eu-central-1 \
    --create-bucket-configuration LocationConstraint=eu-central-1

{
    "Location": "http://allcomputersarebroken.org.s3.amazonaws.com/"
}
Uploading files to the subdomain S3 bucket
Now that the S3 buckets are configured, it is time to upload website content.
Before I upload files to an S3 bucket, I always like to run the command with
the flag --dryrun. This flag shows only what actions it would do. It does
not actually copy or move any files.
To upload only one file, I use
$ aws s3 cp index.html s3://blog.allcomputersarebroken.org
To upload multiple files e.g., the stylesheets for the blog, I use the following command.
$ aws s3 sync css s3://blog.allcomputersarebroken.org/css
The next step is to configure the root domain bucket properly so that it redirects traffic to the subdomain bucket.
Configuring the root domain s3 bucket
To configure the s3 bucket to redirect any traffic to the subdomain bucket, I
have to open the Edit static website hosting settings of the root domain s3
bucket and specify the following.
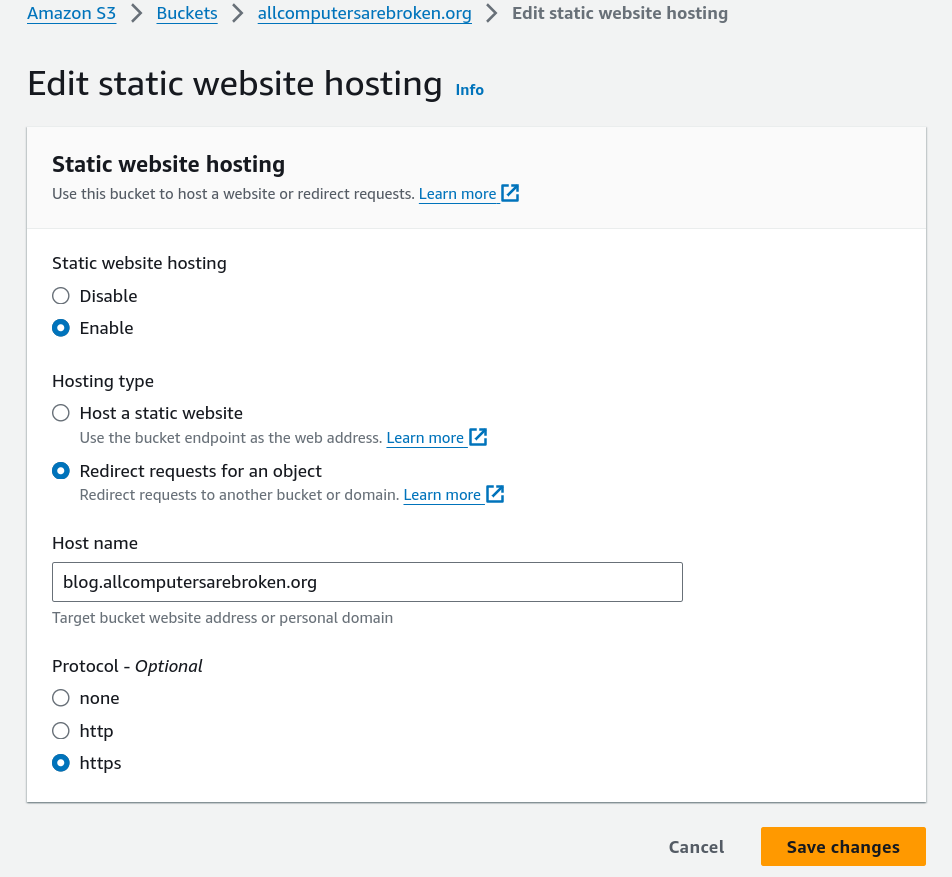
Figure 1: static website hosting configuration
The AWS web console displays an endpoint URL under the Static website
hosting configuration section once the static website hosting configuration
dialog is saved.
This endpoint URL is the AWS s3 website endpoint for the bucket. It will be used to set up an Amazon CloudFront distribution.
Configuring the CloudFront distribution for the subdomain
There are quite a lot settings to be set when creating a CloudFront distribution.
First and foremost, the origin for the CloudFront distribution must be set. In
my case, I set it to the s3 bucket that hold the files of the blog. Since
public access to the s3 bucket is blocked, it is required to specify Legacy
access identities and also select or create a Origin access identity.
Additionally, it should be selected that CloudFront automatically updates the
bucket policy.
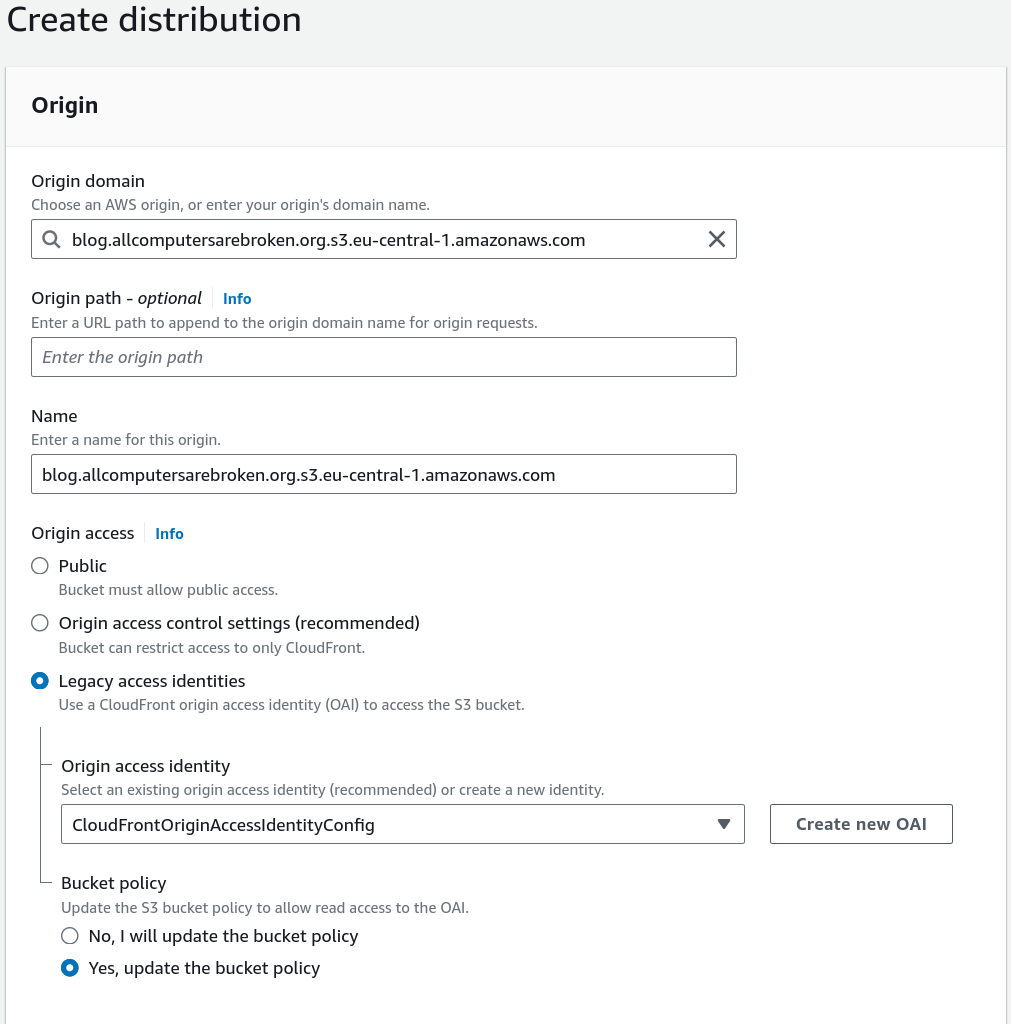
Figure 2: Create CloudFront distribution
I also wanted that HTTP requests are redirected to HTTPS. Therefore, I set the
Viewer protocol policy to Redirect HTTP to HTTPS. The other settings under
Default cache behavior don’t need to be changed.
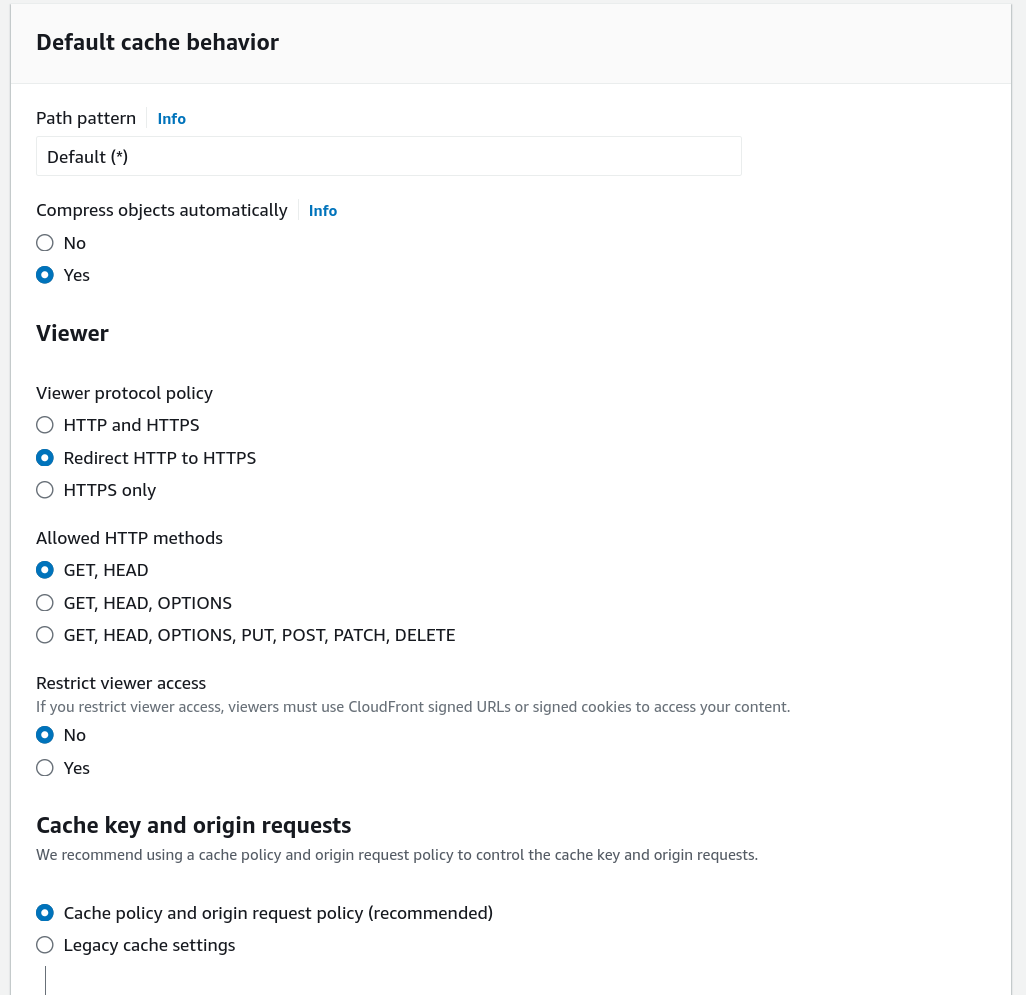
Figure 3: Configuring the default cache behavior
The last part of the CloudFront distribution configuration is the Settings
section. This is where I have to specify a CNAME that will point to the
CloudFront distribution, the TLS certificate, TLS and HTTP versions to be used
as well as IPv6 support.
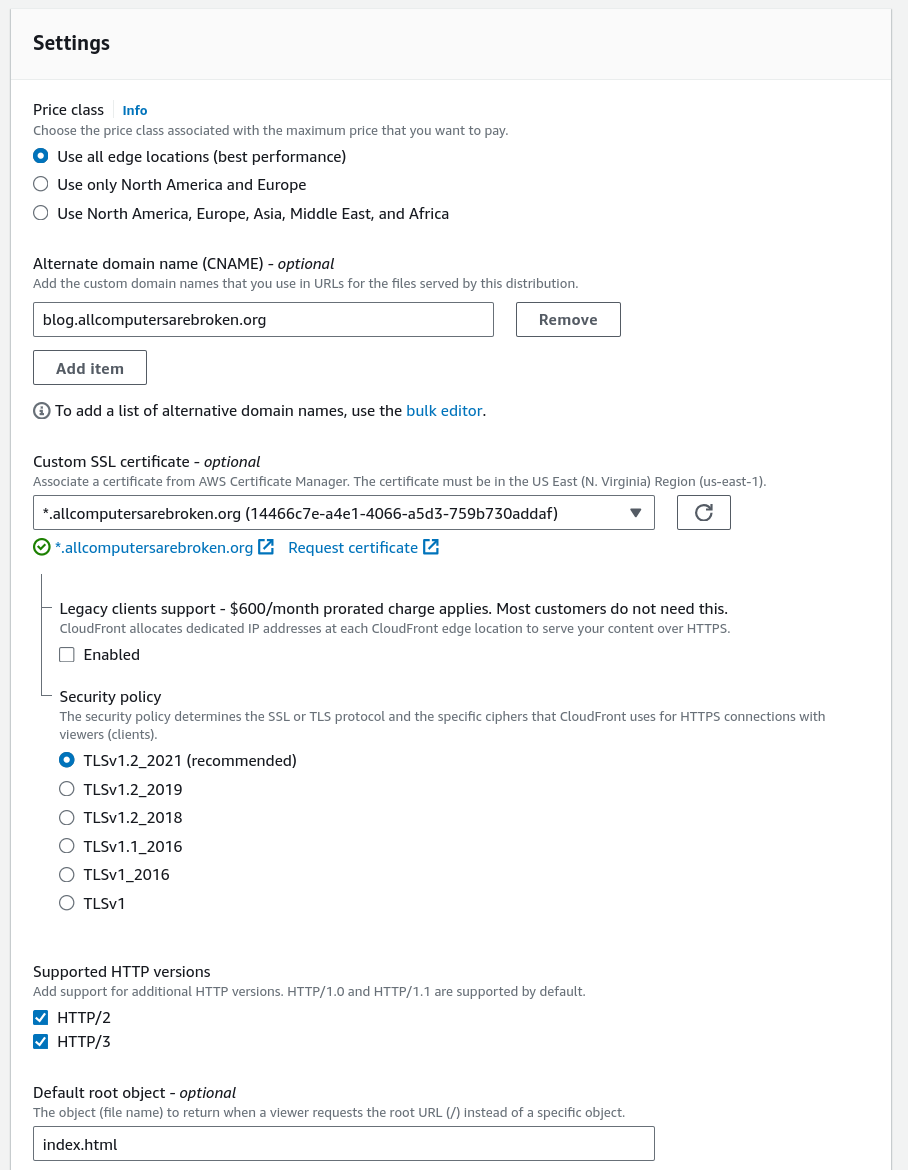
Figure 4: Configuring the distribution settings
Once this is all set, the CloudFront distribution is created by clicking the
Create distribution button at the end of the page.
Configuring the CloudFront distribution for the root domain
The configuration of the CloudFront distribution for the root domain follows the same process as for the subdomain.
However, some slight adjustments are required so that the traffic will be successfully redirected.
In the origin settings, I have to specify the s3 website endpoint as Origin
domain. This s3 website endpoint is listed in the Static website hosting
settings of the s3 bucket.
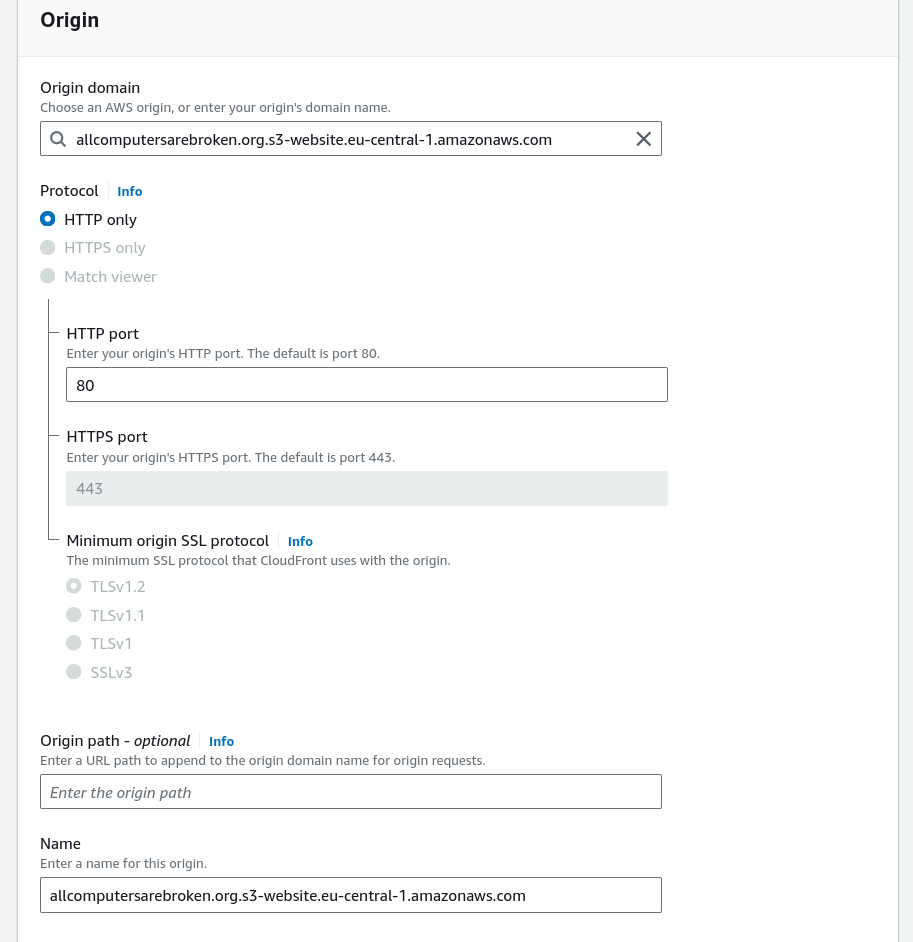
Figure 5: Configuring the origin for the distribution
For the caching settings it is required to set a Cache policy that is called
CachingDisabled. The other settings under Default cache behavior can be
set to the same values like for the subdomain.
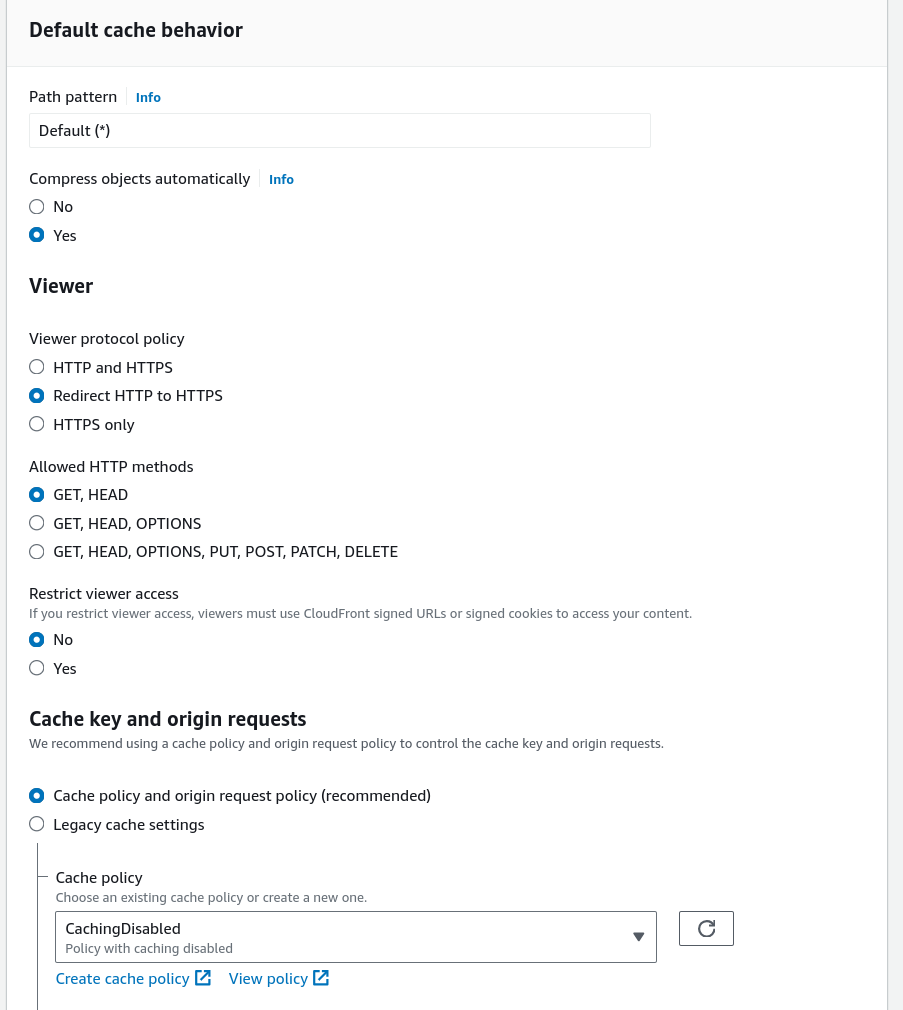
Figure 6: Configuring default cache behavior for root domain
In the Settings section of the CloudFront distribution configuration, the
same values like for the subdomain distribution can be configured.
AWS complaint that the certificate for *.allcomputersarebroken.org does not cover the domain allcomputersarebroken.org. Therefore, I had to request another TLS certificate from Amazon via the following command.
$ aws acm request-certificate \
  --domain-name allcomputersarebroken.org \
  --validation-method DNS \
  --key-algorithm RSA_2048 \
  --region us-east-1
Once the certificate is validated, it can be attached to the CloudFront distribution and the distribution can be created.
Configuring Route53 to route traffic to the CloudFront distribution
Lastly, I only have to create proper DNS records that point to the respective CloudFront distributions.

Figure 7: Setting up DNS records for the CloudFront distribution
Adding a response header policy to a distribution
CloudFront allows setting headers to each response it sends to viewers. To configure what headers should be sent, a response header policy must be created.
I use the AWS CLI to create the policy. AWS has a good description how to create and add such a response header policy documented in their CloudFront developer guide2.
To ease the configuration, the AWS CLI for the cloudfront
create-response-headers-policy provides the --generate-cli-skeleton option
which prints the expected data structure.
$ aws cloudfront create-response-headers-policy --generate-cli-skeleton input > response-headers-policy.json
I changed the values in the file so that it fits my needs. The file looks as follows.
{
    "ResponseHeadersPolicyConfig": {
        "Comment": "",
        "Name": "security_headers",
        "SecurityHeadersConfig": {
            "XSSProtection": {
                "Override": true,
                "Protection": true,
                "ModeBlock": true
            },
            "FrameOptions": {
                "Override": true,
                "FrameOption": "DENY"
            },
            "ReferrerPolicy": {
                "Override": true,
                "ReferrerPolicy": "no-referrer"
            },
            "ContentTypeOptions": {
                "Override": true
            },
            "StrictTransportSecurity": {
                "Override": true,
                "IncludeSubdomains": false,
                "Preload": false,
                "AccessControlMaxAgeSec": 3600
            }
        },
        "RemoveHeadersConfig": {
            "Quantity": 3,
            "Items": [
                {
                    "Header": "Server"
                },
                {
                    "Header": "X-Amz-Server-Side-Encryption"
                },
                {
                    "Header": "X-Amz-Request-Id"
                }
            ]
        }
    }
}
It is now possible to create the policy via the CLI by running the below command.
$ aws cloudfront create-response-headers-policy --cli-input-json file://response-headers-policy.json
The command will output information about the policy once it is created. I have
to note down the Id that is returned as this is needed to link the policy to
the distribution.
To add the policy to an existing distribution, I first have to get the
configuration of the distribution. This is due to the fact that the
cloudfront update-distibution requires to provide the complete distribution
configuration an not only just parts of it as it will override the current
configuration with whatever is provided via the --cli-input-json parameter.
This means uploading a partial configuration will most likely result in a
misconfiguration of the distribution.
To get the current configuration of a distribution, the distribution ID is required.
$ aws cloudfront get-distribution-config --id E2SGCBD55VY3OY --output json > dist-config.json
The file created by the previous command must now be edited to include a
reference to the response header policy. This is done by adding the key
ResponseHeadersPolicyId to the DefaultCacheBehavior object and setting its
value to the id of the response header policy.
...
    "DefaultCacheBehavior": {
...
        "ResponseHeadersPolicyId": "c3494aec-16f3-4204-8baf-b89695bbc10e"
...
    }
Additionally, the ETag key must be renamed to IfMatch. Otherwise AWS
will complain.
Once the changes are made to the dist-config.json the distribution can
be updated.
$ aws cloudfront update-distribution --id E2SGCBD55VY3OY --cli-input-json file://dist-config.json